

Ever felt the need to know a bit more about words like "exposure", "ISO speed", "Aperture", "Shutter Speed", but while looking for explanation got bogged down by further jargons, well, here i will try and explain what they mean, the way it should be ;-"). (I mean photography is art, not rocket science).
Consider a the task of making a dot on a paper with a sketch pen, now the size of the dot will depend on how long you keep the sketch pen in contact with the paper (shutter speed), what is the size of the tip of the pen (aperture), and also on the absorbing power of the paper (ISO speed), sum all these factors and you get the net 'exposure' that your paper had with the sketch pen.
All of these are valid for both digital and analogue cameras.
Now, in a little more detail
Aperture: Well this is measure of how much the lens opens up, to let the light in. They are represented by f numbers like f2.6, f8.0 etc. Please note, smaller the value, wider the opening. (relate to the size of the tip of the sketch pen)
Shutter Speed: This indicates the time, that the shutter (internal cover of lens) opens up to let the light reach the sensor, higher the shutter speed, smaller is the duration, lesser the light that reaches the sensor (relate to the time of contact of sketch pen and paper)
ISO Speed: This term relates to the sensor (film in case of analogue cameras), higher the speed, less light is needed by the sensor to see the object. Typical speeds are ISO 80, 100, 200, 400 800 and so on.
Exposure is the sum total of all these, by that i mean, it is the net amount of light that falls on the sensor/film.
I will explain each of them in more detail also, in future posts, keep checking.
subiet
p.s: These are not very exact and extremely technical definition, because their purpose is to explain to beginners and to people who don't have any idea of what these terms mean, but yeah, they are decently accurate to start with and simple enough to understand.
Saturday, November 11, 2006
| [+/-] |
Understand the Basics, the SIMPLE way |
Friday, November 10, 2006
| [+/-] |
Small Changes, Huge Difference |
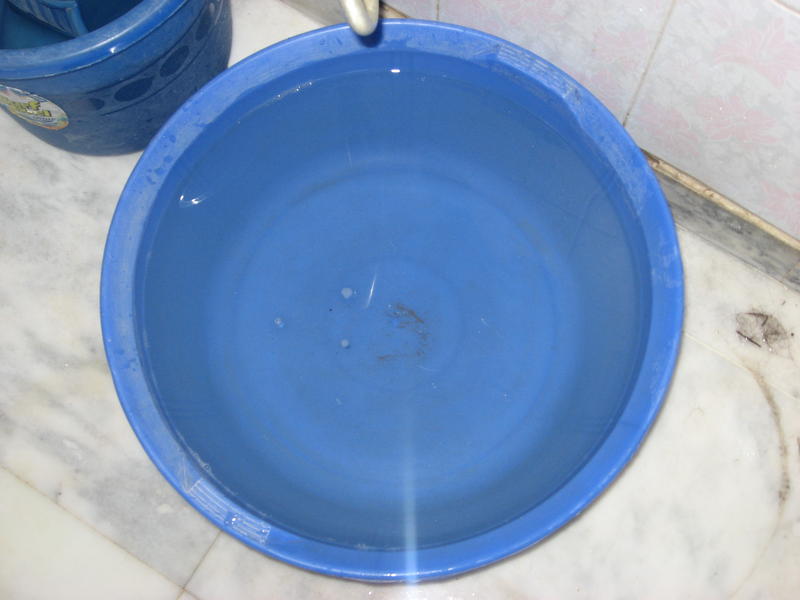
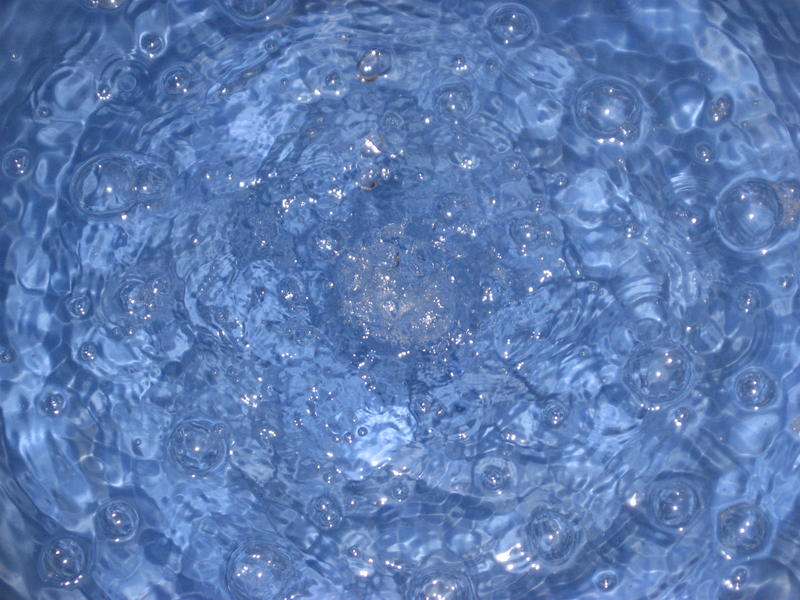
Continuing with the last post's topic of small is big, here is another example. Both the pictures (please click the second one, for a bigger size one, to appreciate it completely, unfortunately my limited bandwidth doesn't allow me to post full resolution photographs, but yes you can request me if you really need it by email) above are of the same blue water filled tub in my bathroom, and here is how to convert the first (arguably the most boring picture) into the second one, which is fizzer than fizz.
Trust me, it is super simple to get great shots, you just have to imagine
Step 1:
Turn on the tap, yeah, the falling water, will cause those pretty bubbles
Step 2:
Just get the interior of the tub, so that without the border of tub, you have the feeling of infinity
Step 3:
Turn off the lights, and fire the flash. This will cause the light to reflect from the uneven surface of water due to the presence of waves and bubbles, and make them shine like crystals
Handy Note:
This second picture, which you can create yourself, is a very good and very soothing wallpaper for your desktop.
| [+/-] |
Composition: Small Things, Big Difference |
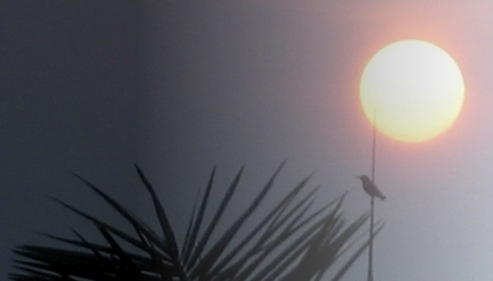
Here is a small example, of how small things, can affect your picture in a big way. In the picture above, had the bird not been there, it would have looked half as good as it does now. This picture was taken from my balcony, pretty early in the morning. I was trying to get a photo, where the bird was flying right across the sun, but i waited for quite some time, and the bird just didn't move. Maybe someday i will get lucky ;-").
To get the right exposure, that is to not over expose the sun, and under expose the tree and the bird (the blurred silhouette was intentional) was pretty critical for this photograph, As this photograph, doesn't like most sunrise photos keeps the sun in the center, so i had to ensure by some other way, to keep the sun as the primary focus of the photograph.
Handy Tip:
Choosing a lower ISO setting, and Focusing at infinity, ensured that the bird and tree was slightly out of focus (so that they don't draw much attention and yet fill the frame artistically), and the Sun didn't spoil the neighboring area. (Lower ISO setting)
Thursday, November 09, 2006
| [+/-] |
Via-My-Lens Picture |
As for the picture, below (The one in my last post), well it is one of my favorites, Here is how i produced it, and what exactly it is:
What it is:
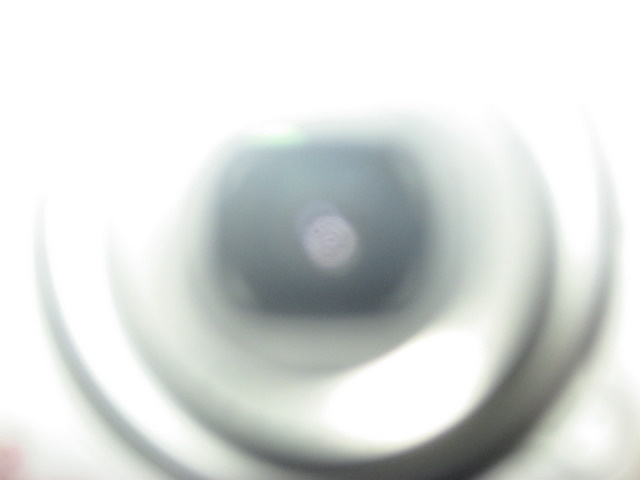
Picture caption: VIA-MY-LENS
Well it is the lens, of the camera, from which the picture was taken itself. I LOVE, to take macro shots of everyday items, to give them a more interesting and different perspective, you will find a lot of such examples in the days to come.
How it was done:
Well, place the camera really really close to a mirror, put the flash on fire mode, and shoot. Yeah, pretty simple and results are good. But to add the slight enigma into picture, you would need to play around with the distance from the mirror and flash power, we Don't want a well focused and well exposed image over here. Out of focus and over exposed, just do the trick fine.
Handy TIP:
If your camera has silver/white body you are in luck ;-), but otherwise also, results can be very interesting.
==========================
A relatively long Post script: ;-")
In this blog I will refrain from using any desktop software for any
touch-ups as far as possible, and also, i will for 95% of the time,
will not post anything, that can be produced only with an SLR, a simple
point and shoot camera, which gives you flexibility over shutter speed,
aperture, focus and ISO settings in the manual mode, and is small
enough to carry everywhere, is the best choice. There are lots of
options available for this under 300$, canon Powershot A540, will be a
very good choice.
Btw, if i use any shot for the purpose of illustration, which hasn't been taken by me, for the sake of convenience, i will explicitly mention it.
Wednesday, November 08, 2006
| [+/-] |
What is this & Is this for you? |
 Well, this is a portal for stuff related to photography, in form of a blog, by someone who loves to freeze time, via-his-lens.
This is for everyone and anyone, right from absolute novices to semi-professionals, most (95%) of the tips and tricks mentioned over here will not require you to spend a fortune on devices (some may well, save you quite a few bucks), or carry a suitcase full of equipment to capture the magic, nor do i expect you to spend hours and hours on photoshop correcting your images, after all digital imaging's USP is convenience and low-cost, isn't it?
Oh, yeah, something VERY IMPORTANT, if there is any tip or photograph, you would like to share with others, via this blog, you are more than welcome to do so, please email me the tip or the photograph (with a brief description if possible), and i will put it up here, giving you full credit. You can mail me at, "subiet.rastogi@gmail.com"